page.url: /jekyll/tutorial/2019/01/22/jekyll-step-by-step-tutorial.html
Learning objectives
Throughout each of the following steps you will see the output, are confronted with error messages, learn, what’s going on behind the scenes and see, how easy it then becomes to make it all work.
Our journey starts with the minimum of what it takes to build a webpage. We then add a first page, and a reference to load a theme. At that point we have a nicely rendered webpage.
We then copy/paste the gem based theme source code into our repository and add a reference to a now missing dependency. At that point, we could start changing the theme’s source code and make our own theme. Instead, we take a step back and make the necessary changes to activate another gem based theme.
Then we add a Gemfile to our repository, which makes sure that our webpage also works, when some dependencies are updated. For this to work we need another gem called bundler, which knows all about the dependencies and generates a Gemfile.lock file, containing all the dependencies and its versions.
The next step is to make our website behave exacty like the starter template by applying the shell command:
$ jekyll new <relative_path_to/repository_name>
And finally we are going to upload the source code to the master branch and publish the compiled website in a new branch called gh-pages on Github.
The result can be accessed with following URL:
Let’s make our first website with jekyll
1) Create an empty folder
$ mkdir relative_path_to/Repository_name
(For shell newbies: do not write the $ signs.)
2) Install gem
$ gem install ‘jekyll’
Output:
Successfully installed jekyll-3.8.5 Parsing documentation for jekyll-3.8.5 Done installing documentation for jekyll after 4 seconds 1 gem installed
3) Check directory
$ ls
Output:
none
4) Build site and start server
$ jekyll serve
Output:
Configuration file: none
            Source: relative_path_to/Repository_name
       Destination: relative_path_to/Repository_name/_site
 Incremental build: disabled. Enable with --incremental
      Generating...
                    done in 0.027 seconds.
 Auto-regeneration: enabled for 'relative_path_to/Repository_name'
    Server address: http://127.0.0.1:4000
  Server running... press ctrl-c to stop.
      Regenerating: 1 file(s) changed at 2019-01-21 20:08:40
                    README.md
                    ...done in 0.014883374 seconds.
Browser output:
Index of /
Name	Last modified	Size
Parent Directory	2019/01/21 20:07	-
README.md	2019/01/21 20:06	474
WEBrick/1.4.2 (Ruby/2.6.0/2018-12-25)
at localhost:4000
It does not show the folder with name _size because the _size folder is the Parent Directory.
5) Add README.md
$ vim README.md
(for vim newbies: press i to input text, select text with v or V and copy into system’s clipboard “+y, paste from system’s clipboard “+p, press Esc to leave the input mode, to write from buffer to file :w, to quit vim :q. Whenever you see a vim command, you have to finish the step with writing and quitting vim.)
6) Check directory
$ ls
Output:
README.md
_site
7) Add Index.html file
$ vim index.html
Input:
Jekyll only needs the body tag.
<!--  the html tag and head tag can be removed -->
<body>
  <h1>Hello World!</h1>
</body>
Browser output:
Hello World!
It has no theme.
Let’s make our first webpage with theme
8) Add _config.yml file and theme
$ vim _config.yml
Input:
# You can have multiple themes in your Gemfile,
# but only one in _config.yml can be loaded by jekyll

# whitelisted theme gems work
theme: jekyll-theme-dinky
#theme: jekyll-theme-merlot
#theme: jekyll-theme-hacker

# not whitelisted theme gems do not work
#theme: hyde  ##does not work
9) Stop and Start server
Whenever you read to stop and start server: press Ctrl-c to stop it.
$ jekyll serve
Output:
Configuration file: relative_path_to/Repository_name/_config.yml
Invalid theme folder: _includes
            Source: relative_path_to/Repository_name
       Destination: relative_path_to/Repository_name/_site
 Incremental build: disabled. Enable with --incremental
      Generating...
                    done in 0.583 seconds.
 Auto-regeneration: enabled for 'relative_path_to/Repository_name'
    Server address: http://127.0.0.1:4000
  Server running... press ctrl-c to stop.
      Regenerating: 1 file(s) changed at 2019-01-21 20:52:09
                    index.html
                    ...done in 0.218392727 seconds.
There is a warning saying Invalid theme folder: _includes. We will investigate later.
10) Add Front Matter to index.html
$ vim index.html
Input:
Front matter is jekylls way to add variables to a file and give instructions like the layout we want to apply to the file
---
title: Home
---
<!--  no theme will be loaded without the front matter above -->


<!--  the html tag and head tag can be removed -->
<body>
  <h1>Hello World!</h1>
</body>
11) Stop and Start server
$ jekyll serve
Output:
There is still the warning saying Invalid theme folder: _includes
Browser output:
no change
12) Add the default layout to the Front Matter in index.html
$ vim index.html
Input:
---
layout: default
title: Home
---
<!--  no theme will be loaded without the front matter above -->


<!--  the html tag and head tag can be removed -->
<body>
  <h1>Hello World!</h1>
</body>
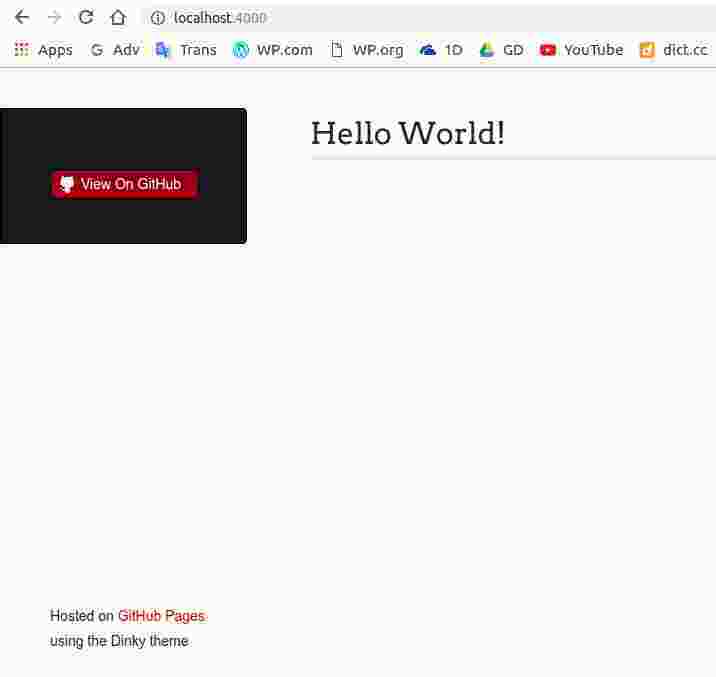
Since we have no default.html file, jekyll is taking the one from the theme we defined in step 8).
13) Stop and Start server
$ jekyll serve
Output:
There is still the warning saying Invalid theme folder: _includes
Browser output:
ta da!
Let’s convert the gem based theme to a regular theme
14) Understand the warning about _includes
The command shows the path to the gem.
$ bundle show dinky
Output:
/home/benzro/.rbenv/versions/2.6.0/lib/ruby/gems/2.6.0/gems/jekyll-theme-dinky-0.1.1
/.rbenv/versions/2.6.0/lib/ruby/gems/2.6.0/gems/jekyll-theme-hacker-0.1.1
We can check the content as follows or just use a file manager.
$ ls $(bundle show dinky)
Output:
assets _layouts LICENSE README.md _sass
The warning obviously just means, that the dinky theme has no _includes folder. We could add one and the warning would disappear until the theme gets updated. So, we just ignore it and do something else. We convert the gem based theme into a regular theme.
15) Copy the gem code into your repository
Let’s open the file manager and show the folder of the dinky theme. The command works on linux, mac uses open.
$ xdg-open $(bundle show dinky)
We now copy/paste the whole content of the dinky theme via file manager into our repostitory. You should have the following folder structure in your repository.
$ ls
Output:
assets _config.yml index.html _layouts LICENSE README.md _sass _site website.jpg
16) Comment the theme
We are going to comment the line saying, jekyll to load a theme.
$ vim _config.yml
Input:
# You can have multiple themes in your Gemfile,
# but only one in _config.yml can be loaded by jekyll

# some whitelisted theme gems
#theme: minima
#theme: jekyll-theme-dinky
#theme: jekyll-theme-merlot
#theme: jekyll-theme-hacker
17) Stop and Start server
$ jekyll serve
Output:
We get the following error:
Liquid Exception: Liquid syntax error (line 7): Unknown tag ‘seo’ in /_layouts/default.html
This is, what we should expect, when integrating the gem source into our repository. If the theme was hosted at RubyGems.org, we would have a .gemspec file showing the gems/plugins the theme depends on. But the source we copied didn’t have a .gemspec file, so we can assume for the whitelisted GitHub themes, hosted on github, some magic is going on behind the scenes.
Let’s take a look at the source code at line 7. Its a command for the seo gem.
18) Add the missing plugin
We are obviously missing a gem, which jekyll calls plugin. So, lets add the jekyll-seo-tag plugin.
$ vim _config.yml
Input:
# You can have multiple themes in your Gemfile,
# but only one in _config.yml can be loaded by jekyll

# some whitelisted theme gems
#theme: minima
#theme: jekyll-theme-dinky
#theme: jekyll-theme-merlot
#theme: jekyll-theme-hacker

plugins:
  - jekyll-seo-tag
19) Stop and Start server
$ jekyll serve
Output:
The warning Invalid theme folder: _includes also magically disappeared even though, our theme still doesn’t have an _includes folder.
Browser output:
and boom, we are back again!
20) Let’s try and activate the merlot-theme
We now uncomment the line telling jekyll to load the merlot theme.
$ vim _config.yml
Input:
# You can have multiple themes in your Gemfile,
# but only one in _config.yml can be loaded by jekyll

# some whitelisted theme gems
#theme: minima
#theme: jekyll-theme-dinky
theme: jekyll-theme-merlot
#theme: jekyll-theme-hacker
21) Stop and Start server
$ jekyll serve
Output:
And the warning saying Invalid theme folder: _includes is back again. But the browser is still showing the dinky theme.
This is an important lesson, because it shows, how jekyll works. It goes to the Merlot theme gem, complains about the missing _includes folder, and starts loading the theme files, which are not present in our repository. But because we have the dinky source in our repository, which follows the same naming convention, the dinky theme remains active. And this is also the reason, why some smart people invented gem based themes.
22) Rename the folders
Input:
Let’s rename the theme folders. I just added an underscore at the end of the three theme folders.
Output:
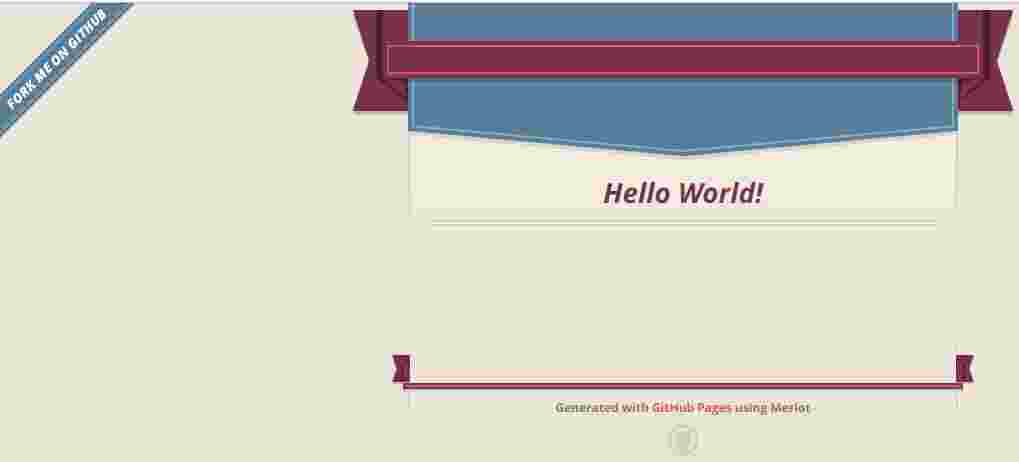
The server starts complaining after the first renaming, but after all three folders have been renamed and the browser is refreshed, it shows the new theme.
Browser output:
howdy, merlot!
You should now have the following folder structure.
$ ls
Output:
assets_ config.yml index.html _layouts LICENSE README.md sass _site website.jpg
Let’s lock the dependencies
23) Add a Gemfile file
$ vim Gemfile
Input:
source 'https://rubygems.org'
gem 'jekyll'
This is similar to what we did in step 2), but now we let the bundler gem lock the dependencies.
24) Install bundler
$ gem install ‘bundler’
25) Install gems and generate Gemfile.lock file
$ bundle install
Output:
Fetching gem metadata from https://rubygems.org/............
Fetching gem metadata from https://rubygems.org/..
Resolving dependencies...
Using public_suffix 3.0.3
Using addressable 2.6.0
Using bundler 2.0.1
Using colorator 1.1.0
Using concurrent-ruby 1.1.4
Using eventmachine 1.2.7
Using http_parser.rb 0.6.0
Using em-websocket 0.5.1
Using ffi 1.10.0
Using forwardable-extended 2.6.0
Using i18n 0.9.5
Using rb-fsevent 0.10.3
Using rb-inotify 0.10.0
Using sass-listen 4.0.0
Using sass 3.7.3
Using jekyll-sass-converter 1.5.2
Using ruby_dep 1.5.0
Using listen 3.1.5
Using jekyll-watch 2.1.2
Using kramdown 1.17.0
Using liquid 4.0.1
Using mercenary 0.3.6
Using pathutil 0.16.2
Using rouge 3.3.0
Using safe_yaml 1.0.4
Using jekyll 3.8.5
Bundle complete! 1 Gemfile dependency, 26 gems now installed.
Use `bundle info [gemname]` to see where a bundled gem is installed.
26) Check directories
$ ls
Output:
assets_ config.yml Gemfile Gemfile.lock index.html _layouts LICENSE README.md sass _site
Let’s turn the website into the default website
We make now a new website and add the content of this README.md file to a new post.
27) New website
$ mkdir relative_path_to/repository_name
$ jekyll new .
(The dot is needed)
Output:
Running bundle install in relative_path_to repository_name...
  Bundler: The dependency tzinfo-data (>= 0) will be unused by any of the platforms Bundler is installing for. Bundler is installing for ruby but the dependency is only for x86-mingw32, x86-mswin32, x64-mingw32, java. To add those platforms to the bundle, run `bundle lo
ck --add-platform x86-mingw32 x86-mswin32 x64-mingw32 java`.
  Bundler: Fetching gem metadata from https://rubygems.org/...........
  Bundler: Fetching gem metadata from https://rubygems.org/.
  Bundler: Resolving dependencies....
  Bundler: Using public_suffix 3.0.3
  Bundler: Using addressable 2.6.0
  Bundler: Using bundler 1.17.2
  Bundler: Using colorator 1.1.0
  Bundler: Using concurrent-ruby 1.1.4
  Bundler: Using eventmachine 1.2.7
  Bundler: Using http_parser.rb 0.6.0
  Bundler: Using em-websocket 0.5.1
  Bundler: Using ffi 1.10.0
  Bundler: Using forwardable-extended 2.6.0
  Bundler: Using i18n 0.9.5
  Bundler: Using rb-fsevent 0.10.3
  Bundler: Using rb-inotify 0.10.0
  Bundler: Using sass-listen 4.0.0
  Bundler: Using sass 3.7.3
  Bundler: Using jekyll-sass-converter 1.5.2
  Bundler: Using ruby_dep 1.5.0
  Bundler: Using listen 3.1.5
  Bundler: Using jekyll-watch 2.1.2
  Bundler: Using kramdown 1.17.0
  Bundler: Using liquid 4.0.1
  Bundler: Using mercenary 0.3.6
  Bundler: Using pathutil 0.16.2
  Bundler: Using rouge 3.3.0
  Bundler: Using safe_yaml 1.0.4
  Bundler: Using jekyll 3.8.5
  Bundler: Using jekyll-feed 0.11.0
  Bundler: Using jekyll-seo-tag 2.5.0
  Bundler: Using minima 2.5.0
  Bundler: Bundle complete! 4 Gemfile dependencies, 29 gems now installed.
  Bundler: Use `bundle info [gemname]` to see where a bundled gem is installed.
New jekyll site installed in relative_path_to/repository_name.
28) Copy/paste this README.md into a new post
First we copy it into the root of the new repository, or just copy/paste it with a file manager.
relative_path_to_/repository_name/README.md
Then we copy/paste it again but this time into the _posts folder.
relative_path_to/repository_name/_posts/README.md
And rename the file according to the naming converntion for posts.
mv relative_path_to/repository_name/_posts/README.md relative_path_to/repository_name/_posts/2019-01-19-jekyll-step-by-step-tutorial.md
29) Add Front Matter to the post
$ vim relative path_to/repository_name/_posts/2019-01-19-jekyll-step-by-step-tutorial.md
Input:
---
layout: post
title:  "Welcome to Jekyll's step by step tutorial!"
date:   2019-01-22 03:56:34 +0100
categories: jekyll tutorial
---
30) Copy/paste images
relative_path_to_/repository_name/assets/website.md
relative_path_to_/repository_name/assets/website2.md
The path to the images in both the README and the post should be: /qool-jekyll_step_by_step-loop/assets/website.jpg /assets/website.jpg
/qool-jekyll_step_by_step-loop/assets/website2.jpg /assets/website2.jpg
There is a better way of doing it, but that’s good enough. The above path is for the production environment, and the link below is for the development environment. The links are created with following Markdown pattern.

Let’s Deploy to GitHub
31) Initialize git in your repository root
Go to your repository’s root and initialize git.
$ cd relative_path_to/repository_name
$ git init
32) Adapt the .gitignore file
We do not want our _site folder in our remot master branch, that’s why the .gitignore file also has the following entry.
$ vim .gitignore
_site/
33) Adapt the _config.yml file
You may change here to another whitelisted theme, which is more appealing to you.
$ vim _config.yml
Important: If you are hosting on Github, the best way is to make the following changes at the beginning of the project and add to all links the baseurl. On Github you do not need to and should not define the url. That way your source on localhost behaves the same way as on Github’s user or project pages, with souce code or with compiled code. Here is an example.
https://qoolixiloop.github.io/qool-jekyll-loop/
For a user page with compiled code
baseurl: “” # the subpath of your site, e.g. /blog
url: “” # the base hostname & protocol for your site, e.g. http:/
For a project page
baseurl: “/repository name” # the subpath of your site, e.g. /blog
url: “” # the base hostname & protocol for your site, e.g. http:/
34) Build the site and commit
With the Gemfile and bundler we need to adapt our build and serve commands.
$ bundle exec jekyll serve
(or bundle exec jekyll build; serve also starts the server, listens to file changes and rebuilds automatically)
$ git add .
(The dot is needed)
$ git commit -m “source code”
35) Move the compiled code to a new branch root and commit
Disclaimer: There may be better ways to do this. To copy/paste and delete you can also take the file manager. Whenever you change a branch, git switches your files in the file manager. Just be careful that you are in the gh-pages branch when you start deleting files (use $ git branch to test). As long as you do not delete the .git folder most things can be restored but you need advanced knowledge, a search engine and/or a site like stackoverflow.
Create new branch
The branch name is not arbitrary. Use gh-pages.
$ git branch gh-pages
Check out to new branch
This will copy the snapshot from master branch into the new branch.
$ git checkout gh-pages
Remove all files for this branch
$ git rm -rf .
(dot is needed)
(Before you delete: check that you really are in the branch gh-pages and with $ rf-files, whether you see the _site folder. If you see it, git sees it as well. If you remove it, you have to check it out again with $ git checkout master _site. Otherwise, you may also take your file manager. What you need in the end is the .git foder, .gitignore file, and the contents of the _site copied out of the folder next to it, .git and .gitignore. Then you can delete _site.)
Retrieve .gitignore and activate _site folder
Now we change the .gitignore folder to make _site folder known to git and therefore visible for us in the new branch.
$ git checkout master – .gitignore
Remove the line _site.
vim .gitignore
Input
remove _site from .gitignore file
.sass-cache
.jekyll-metadata
The folder _site now becomes visible in the new branch.
_site folder contents
Move the contents of the _site folder to root, i.e. where the _site folder is and delete it. The index.html file must reside in repository branch root, otherwise it is not going to work. You can take your file manager or use mv or git mv command.
Commit changes
$ git commit -m “ content of _site folder, .git and .gitignore”
36) Open account and repository at GitHub
Go to Github.com, if you do not have one, make an account and add a repository. Following the naming pattern below. The project page didn’t work for me to host the source code and have it built with jekyll, because the _config.yml is either not read or not updated. But this does not mean it can not be done. Anyway, you can make a branch gh-pages, which contains only the _site folder’s content, .git and an own .gitignore file, like we just did. Or you can make a user page. With a user page the source code works fine.
Account name
Choose an account name.
<my_account>
Repository name for a user page
This is a special repository. You can only have one user page per user account, with exactly the following naming condition.
<my_account>.github.io
Repository name for a project page
If there would not be a user page repository, this would probably be called repository page, instead of project page.
<project_name>
Website URL
After uploading, the website is accessible under:
user page: https://<my_account>.github.io
project page: https://<my_account>.github.io/<project_name>
Settings
In your repostitory on Github go to settings tab, scroll down to GitHub Pages section and choose your branch (master, master/docs or gh-pages).
37) Push both branches of your website to GitHub.
$ git checkout gh-pages
$ git push –set-upstream origin/gh-pages gh-pages
$ git checkout master
$ git push
Congratulation!
You have just hosted your first webpage on Github.
Rebuild
In case you want to upload an updated version to the gh-pages branch repeat following steps.
38) Checkout master branch and change source
It assumes you make your changes in the master branch. Check that you are in the master branch before you start making changes and rebuild.
$ git branch
If the output is not master, checkout to master branch.
$ git checkout master.
Make your changes to the source code.
Change theme
When changing from minima to one of the whitelisted GitHub themes some steps have to be taken. I am going to take the jekyll-theme-hacker.
i) Change config.yml and replace minima with hacker theme
theme: jekyll-theme-hacker
If you now try to build you get an error.
$ bundle update
$ bundle exec jekyll build
jekyll 3.8.5 | Error: The jekyll-theme-hacker theme could not be found.
ii) Change the Gemfile file
The search engine finds for you the following link:
https://rubygems.org/gems/jekyll-theme-hacker/versions/0.1.0
Copy the line for the Gemfile and add it to the Gemfile file
gem 'jekyll-theme-hacker', '~> 0.1.0'
If you now try to build you get another error.
$ bundle update
$ bundle exec jekyll build
Build Warning: Layout 'page' requested in about.md does not exist.
Build Warning: Layout 'home' requested in index.md does not exist.
Obviously jekyll’s site template has two additional layout files for posts and about pages. Instead of changing our content, we just add the two layout files and make a redirect to existing layout files in the hacker theme.
iii) Add folder _layouts and two files posts.html and pages.html in it.
# home.html
---
layout: default
---
# page.html
---
layout: default
---
Now also the rebuild should work.
$ bundle exec jekyll build
39) Build the site and commit
$ bundle exec jekyll build
$ git add .
(The dot is needed)
$ git commit -m “source code”
40) Move the compiled code to gh-pages root and commit
$ git checkout gh-pages
Again files and folders are copied over from the master branch. Assuming we still have the .gitignore from step 35) we should also see the _site folder.
$ git status
_site folder contents
Move the contents of the _site folder to root, i.e. where the _site folder is and delete it. The index.html file must reside in repository branch root, otherwise it is not going to work. You can take your file manager or use mv or git mv command.
Commit changes
$ git commit -m “ updated content of _site folder”
41) Push both branches of your website to GitHub.
$ git checkout gh-pages
$ git push
$ git checkout master
$ git push
qoolixiloop, 22. Jan. 2019